


Beschreibung
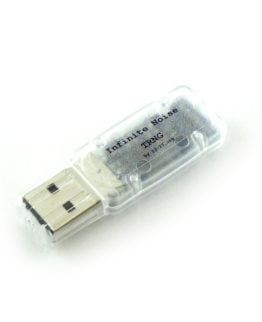
Infinite Noise TRNG
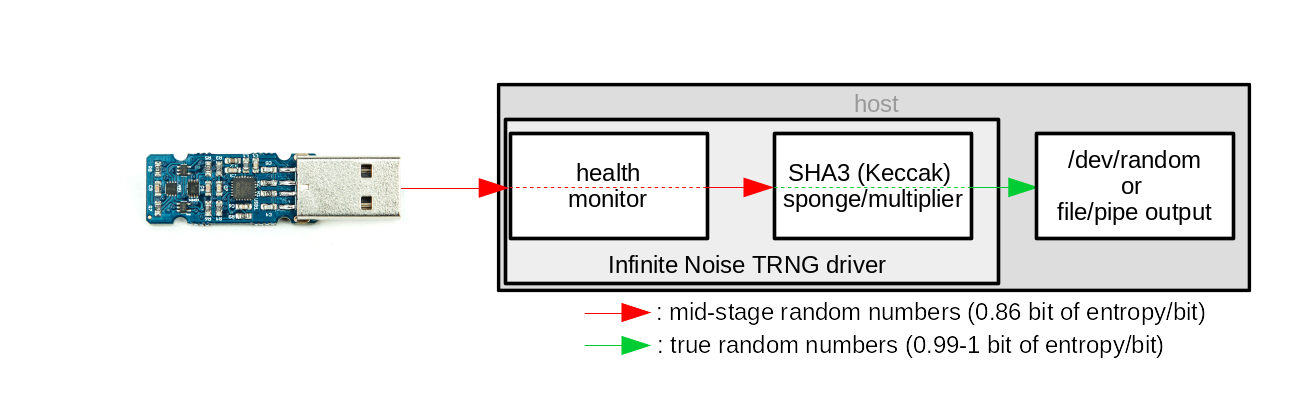
Der „Infinite Noise TRNG“ ist ein Zufallszahlengenerator (RNG), der nach dem Prinzip „modular entropy multiplication“ arbeitet.
- keine Firmware (die durch einen Angreifer manipuliert werden könnte)
- Verwendung von Standard-Bauteilen
- Entropie “health-monitoring” im Treiber
- open source hardware
- freie Software
- Hergestellt in Deutschland
Im Gegensatz zu den meisten Hardware-Zufallszahlengeneratoren benötigt der Infinite Noise TRNG keine “zentrale” Entropie-Quelle Stattdessen leistet jede Komponente in der Signalschleife ihren Beitrag zum Zufallssignal, welches wiederrum als Grundlage für die nächste Runde dient. Somit ist es auch einem Angreifer unmöglich ein Signal einzuschleusen.
Ein weiterer herausragender Sicherheitsaspekt stellt das „Whitening“ durch einen softwaregestützten Hash-Algorithmus (Keccak/SHA3) dar. In nahezu allen verfügbaren Zufallsgeneratoren ist dies in Hardware implementiert. Eine Umsetzung im Treiber wie beim Infinite Noise ist wesentlich flexibler und dazu noch transparenter für den Anwender.
Unter Verwendung der von uns bereitgestellten GNU/Linux-Pakete wird das Gerät automatisch beim Einstecken erkannt und der Treiber gestartet, sodass /dev/random vom Gerät gespeist wird.
Nach dem Anschließen meldet sich das Gerät als “13-37.org – Infinite Noise TRNG” – oder “Future Technology Devices International, Ltd Bridge(I2C/SPI/UART/FIFO)“.
Hierbei handelt sich um den verwendeten integrierten Schaltkreis für die USB-Schnittstelle.
Unter 13-37.org/verify kann zudem die Seriennummer des Chips kontrolliert werden. Dort finden Sie auch Konfigurationen zum Ändern der USB Device Identifier. (siehe auch FAQ)
Für Windows gibt es noch keine sinnvolle Anwendung, lediglich ein Tool um Zufallsdaten zur späteren Verwendung in Dateien zu schreiben.
Technische Daten
- USB2.0 Schnittstelle
- 30KByte/s – 32MByte/s Ausgabe (Multiplikator: 1 – 1000)
- Abmessungen: 50mm (L) x 19mm (B) x 8mm (H)
- Gewicht: 10g
- sehr geringer Stromverbrauch von 8mA bei 5V
Links & Ressourcen
| Treiber | Downloads & Repositories |
| Github | https://github.com/13-37-org/infnoise |
| Serial number verification | leetronics.de/verify |
| Bedienungsanleitung | |
| EU-Konformitätserklärung | |
| Crowd Supply Kampagne | https://crowdsupply.com/13-37/infinite-noise-trng |
| Blog Post von EnhancedRadio (Beispiele mit Windows) | New: Infinite Noise TRNG (True Random Number Generator) |
FAQ
Driver
How to verify the package signature?
1. Get the key fingerprints
The fingerprints of the code signing key used for all the packages and repositories can currently be found in four different locations:
- Crowd Supply campaign
- GitHub
- 13-37.org
- the user manual (link below)
After you did this, continue with the installation as described on Linux packages for the Infinite Noise TRNG
2. Download and verify the public key
$ wget -O 13-37.org-code.asc https://13-37.org/files/pubkey.gpg

Verify the keys fingerprint:

# GPG1
$ gpg --with-fingerprints 13-37.org-code.asc
# GPG2:
$ gpg2 --import-options import-show --dry-run --import < 13-37.org-code.asc
3.1 Debian/Ubuntu
Add the public key to apt’s keyring:
$ sudo apt-key add 13-37.org-code.gpg3.2 RPM
Import the public key to rpm’s keyring:
$ rpm --import 13-37.org-code.asc
3.3 ArchLinux
TODO
How to compile the driver?
To compile the driver, you’ll need the libftdi development files installed. Usually called libftdi-dev – or also compile it from source.
$ git clone https://github.com/13-37-org/infnoise/
$ cd infnoise/software
$ make
$ make install
The init scripts and udev rule in software/init_scripts are not installed this way. You can do it manually. Just follow the software’s README on github.
When running infnoise, I get “USB read or write failed” after some seconds
Each instance of the driver uses the corresponding USB device exclusively, so its not possible to run the driver twice – and trying to do so will result in these error messages.
Make sure you have stopped the Infinite Noise service, as it will try to restart – causing that error. If you’re using it behind an USB hub, try connecting it directly to your port. (Or try another USB port)
# sudo service infnoise.service stop
Optionally, you can also mask the service so it also won’t be restarted if you plug in the device.
# sudo systemctl mask infnoise.service
If all this doesn’t help, please contact us as this may indicate a problem with the hardware.
Is it possible to use multiple devices in parallel?
Yes – we can! But only on Linux (so far).
There are different scenarios in which this may be useful, as you can have only one session per device.
1. You want to use it in /dev/random mode and use the binary to play with random data at the same time
You could stop the service with service infnoise stop so you can execute infnoise without problems. Otherwise systemd will kick you out again (and you’ll se the error message USB read/write failed) as it tries to restart the driver.
The supplied systemd unit file reads a configuration file in /etc/infnoise.conf where you can INFNOISE_SERIALaccording to the device to be used for /dev/random mode – and use further devices for whatever you want.
If you don’t want it to start at all – just disable it with systemctl mask infnoise.
2. You need more speed
When you have a custom application requiring huge amounts of random data, you can attach at least 10 devices in parallel – as I do for production testing (at a single USB hub!).
Just be aware this may cause a lot of cpu load – especially when you want to combine it a huge whitening multiplier – and you’ll need to merge the data streams somehow (or use one device per thread?).
Note: Don’t use other devices on the same USB hub – and even better use a real port for each device, as timing issues may arise.
How To Use
There are several different ways to consume the entropy.
/dev/random (only works with GNU/Linux)
Just let it feed /dev/random and feel a bit safer while accelerating your cryptographic operations when you do lots of them.
This is the default mode of operation of the downloadable packages as feeding the kernel’s entropy pool is the simplest way to get entropy to where its needed.
The systemd service used to start the driver configuration file /etc/infnoise.conf where you can change some parameters used in this mode of operation.
Note: Remember to stop the service before using the other ways described below.
$ sudo service infnoise stop
When you don’t want it to start when you plugin the device, you can disable it permanently with:
$ sudo systemctl mask infnoise.serviceRun it from the command line
Execute the binary and capture its stdout for further processing (Windows, MacOS and GNU/Linux)
You can simply run the infnoise command with its various parameters command after compiling it from source or installing the compiled and signed packages.
Keep in mind you need to stop other instances running on the same device.
Integrate into your custom application
Call the binary within your custom application and capture stdout and optionally also stderr to use the data while monitoring the health monitor.
There are some usage examples for this on GitHub.
There is also a shared C library (libinfnoise) to built upon. Examples are also on Github (see above).
Hardware
Why is whitening not implemented in hardware?
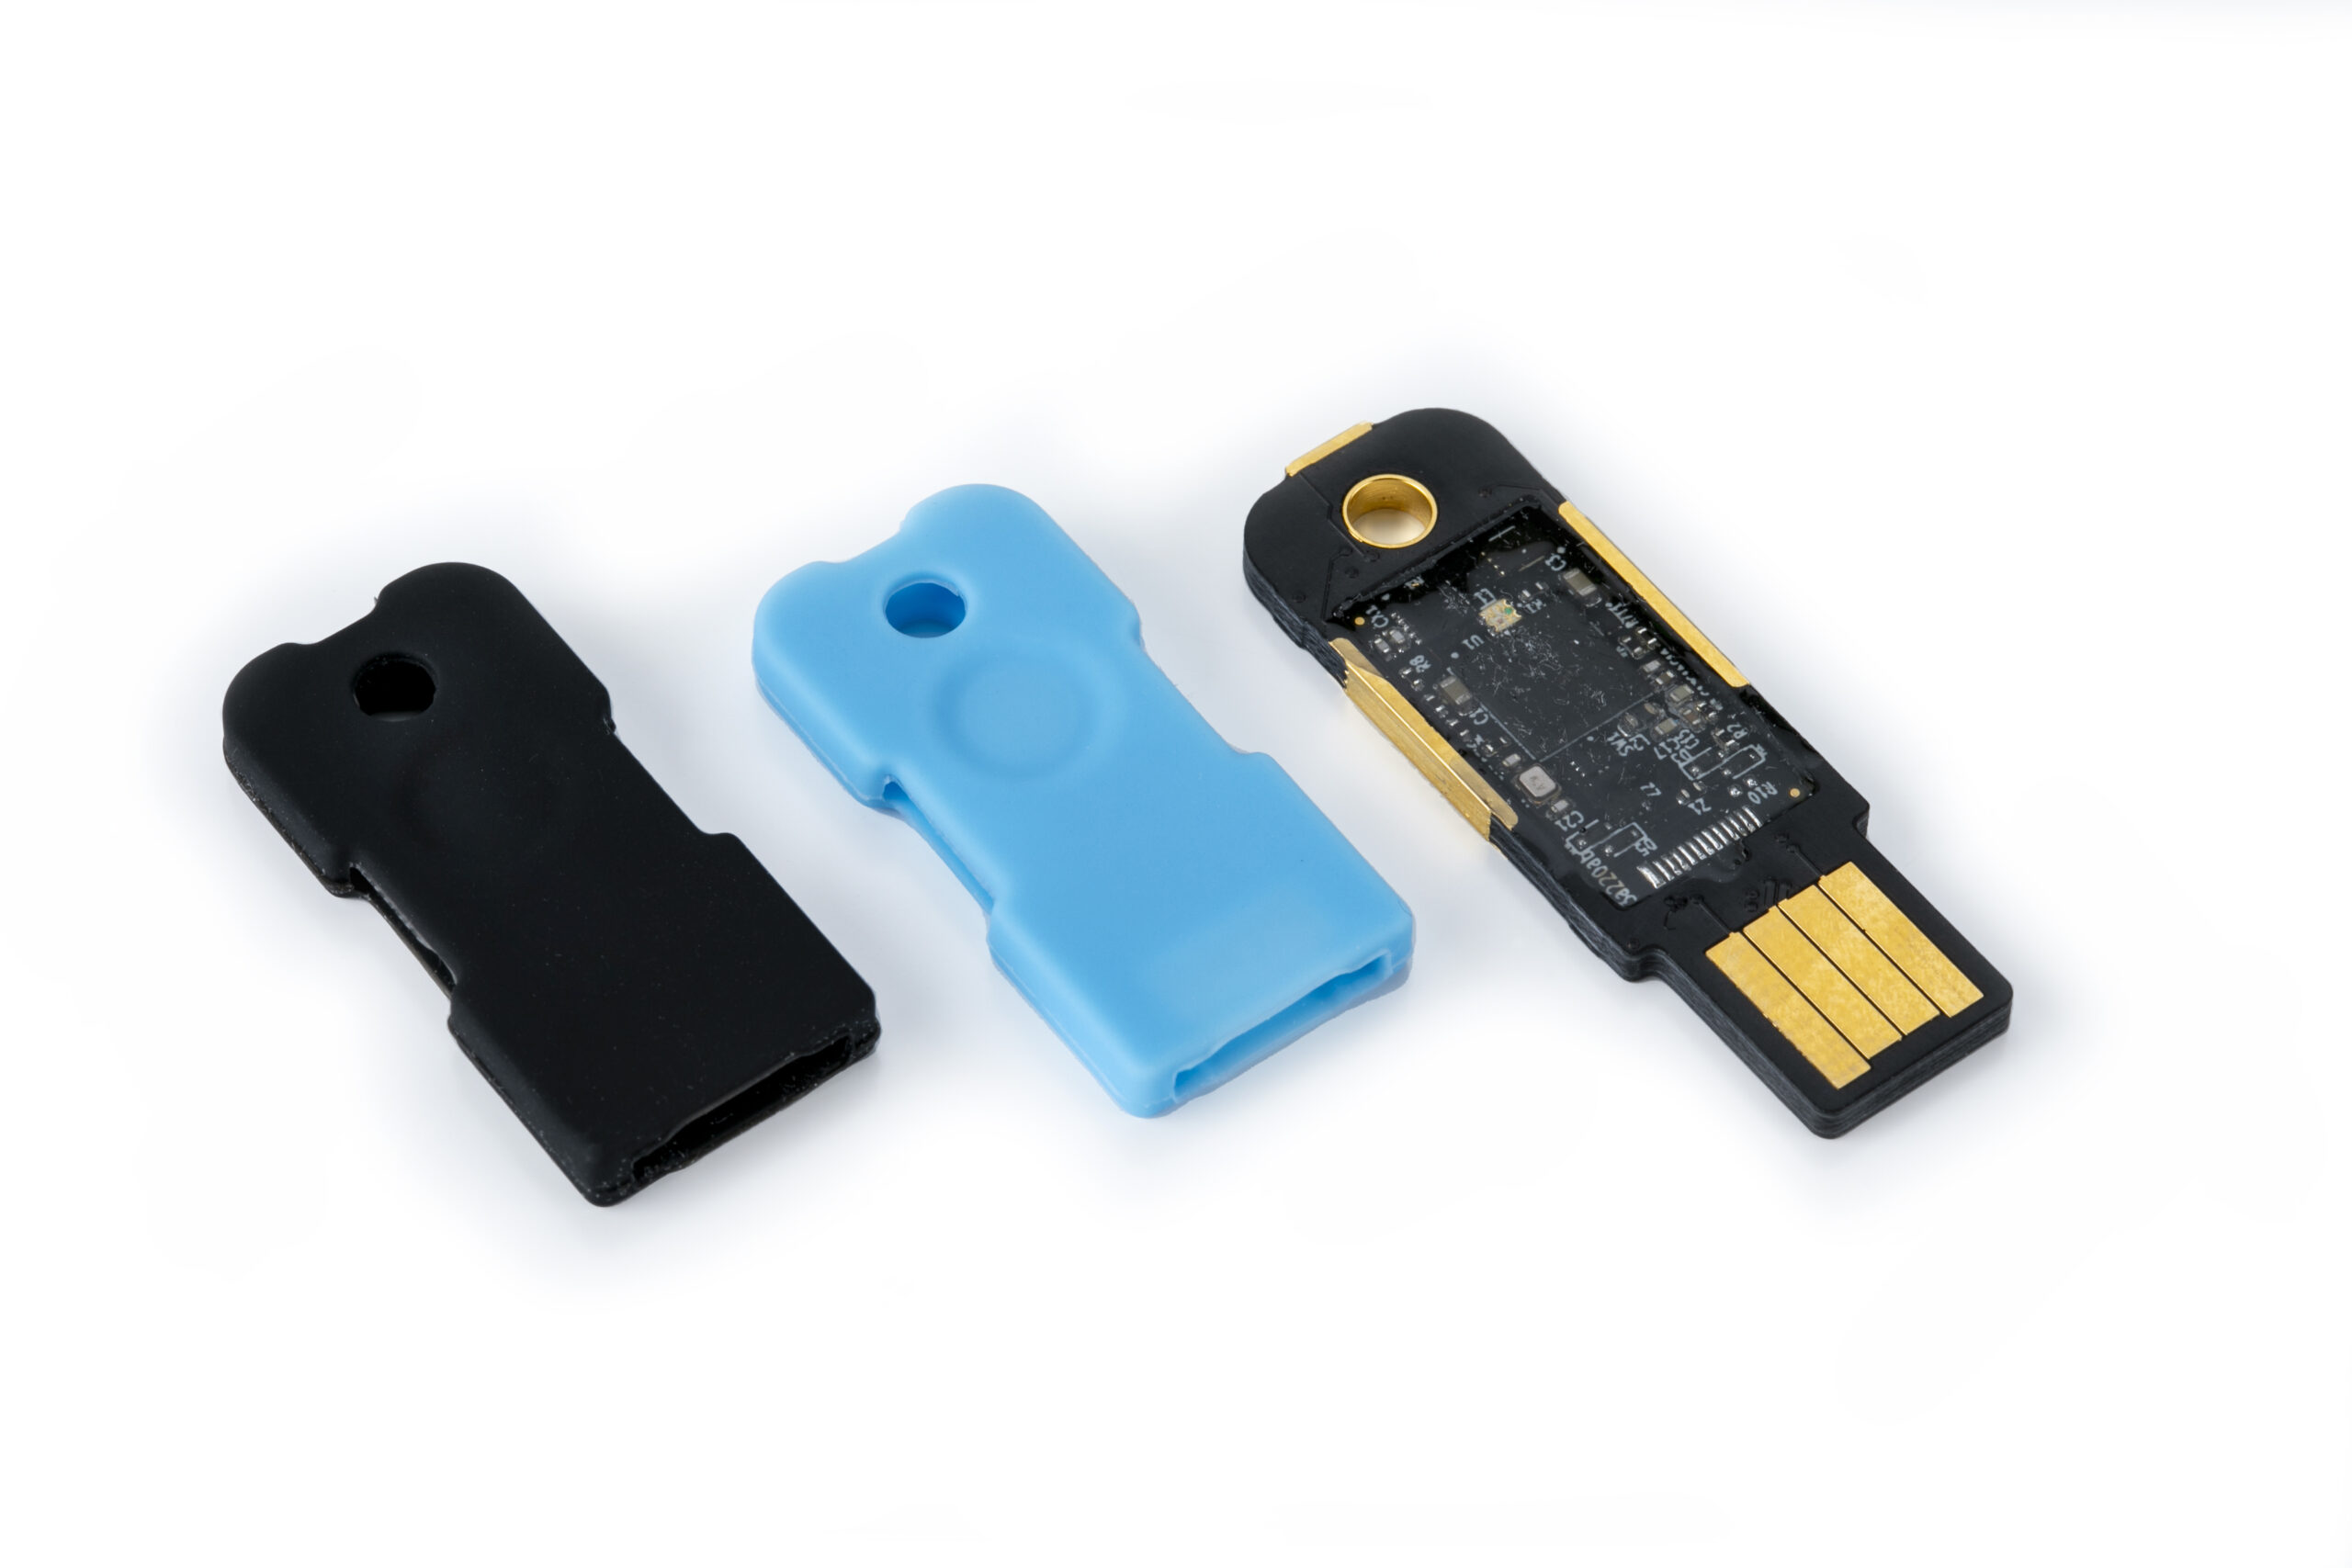
The Infinite Noise does not have microcontroller capable of this. It uses an off-the-shelf usb chip to interface with your computer. This way there is no programmable logic in the signal path. See update #3 for details.
Why this is an essential security feature? As the driver always sees the raw stream from the device, it is able to constantly verify the data is OK to use.
Why does it have no firmware?
By using an off-the-shelf usb chip there is no reprogrammable logic in the signal path. This is great as it reduces the attack vectors on the device dramatically.
See updates #3 and #5 of the Crowd Supply campaign for more details.
How can it have a serial when there is no firmware?
The USB chip has no re-programmable logic, but still offers us access to an EEPROM to save application or USB specific data like the Vendor- and Product-ID’s as well as an usually factory programmed serial number (i.e. DM00WOEF)
In the first place, I did not want to change the EEPROM settings at all and just use the “unique” serial numbers from FTDI. But as we’ve been getting close to the 5000$ goal so fast, I continued working on the workflow to create the labels.
It turned out to be very complicated to read-out the actual serial number and print (super-small) labels one by one. And I wasn’t so sure about the uniqueness of FTDI’s serial numbers. That’s why a new serial number is assigned from a database of pre-generated ones right after the final production test has passed. The dataset of the specific serial number is completed with the test results, a batch number, the “unique” FTDI serial and a timestamp.
By integrating this into the automated workflow of device testing I just need to put the right label onto the device (and my script tells me which one goes where).
How can I restore its original serial
Yes you can! Using the FTDI FT_Prog utility for Windows this is pretty easy. There is also a command line tool ftdi_eeprom included in the fully open-source FTDI driver that I’m using in the production workflow – buts its very low-level.
Using the online verification service you can download a generated config file to restore it’s original or its production serial, using the .CONF for the Linux tool or .XML for Windows/FT_Prog.
If you have removed the security label (or did not have one), write down your original serial number before you continue, otherwise you might loose it forever. There is no way for me to associate the serial numbers to purchases, so I won’t be able to help you. Warranty claims are of course still possible, as long as you have the invoice/order receipt.
Modular Entropy Multiplication and SHA-3
Some important aspects of modular entropy multiplication and the Keccak SHA-3 sponge used for whitening.
Why not use the raw output directly?
Of course you can access the raw output stream by using --raw – but has only 286.000 bits of entropy in 300.000 bits. Anyway its a very reliable source of true random numbers to feed into a hashing function (like SHA-3). If you want to feed it into a different whitening algorithm – using --raw is an option. When going this way its probably easier to integrate it in the existing open source driver (and share).
How does the output multiplier work?
Normally the driver reads as many bytes from the Keccak sponge as raw data was put in. As we read the full buffer of the USB chip at once, this is always 64 bytes/512 bits of entropy per round.
Using the multiplier the data rate be extended to 256 * MULTIPLIER bits with (almost) no degradation in entropy.
Data is still read in chunks of 1024 bits between each permutation of the Keccak state, to not compromise the full internal state (which has 1600bit/200 bytes). After 256*MULTIPLIER bits have been read, it is reseeded with 512 bits of raw entropy. The full Keccak state is never exposed, as this would allow attacks on it.


Appwork GmbH –
Works great! Out of the box! Well, at least on the 2nd box 🙂 We couldn’t get it working on a SEH UTN-80 USB Server but works great with UTN-2500 USB Server. We use it for virtual machine.
Nicht verifizierter Kauf. Mehr Informationen
Patrick Hanft –
I just installed infnoise from Arch User Repository, added serial number to configuration file and was up and running.
Verifizierter Kauf. Mehr Informationen
pitit manman mari live now –
I very delighted to find this internet site on bing just what I was searching for as well saved to fav
Nicht verifizierter Kauf. Mehr Informationen